Customer Information Tab

The Alternate Name is similar to DBA (Doing Business As) name but is not the same as the DBA field on an Enrollment. The field on the Enrollment form is strictly a vendor field (customer vendor or master vendor).
Affiliate IDs are contract numbers, sent to us by Cambridge, used by specific customers to pay beneficiaries. This field is only populated for international customers and cannot be changed.
Payment Methods
This section displays icons that indicate which payment methods the customer accepts.
Beneficiaries
This section only displays for international customers.
This section is still work in progress.
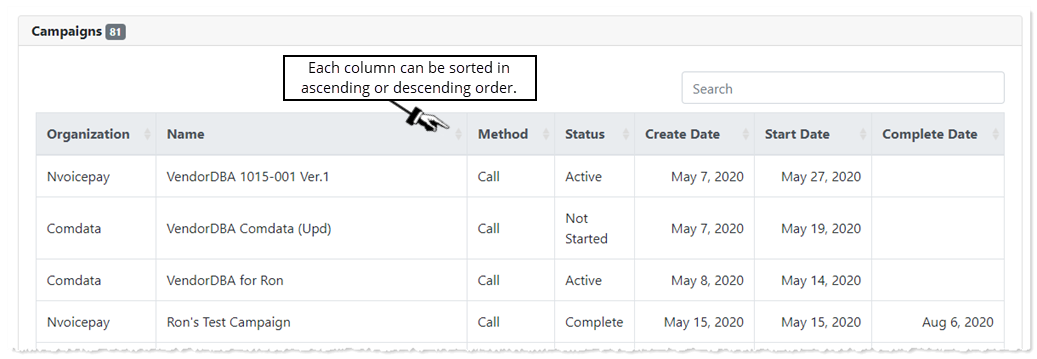
Campaigns
This section provides a list of all the campaigns associated with this customer.
If you have permission to access the Campaigns area of Ops Toolkit, you can click anywhere within a campaign row to open the campaign. Otherwise, the table is read only.
Logos
Logos are used with the custom URLs sent to vendors. When no logo is uploaded, the Customer Name entered when creating the custom URL is used in place of a logo.
You can upload multiple customer logos and use up to five logos with each custom URL.
The first logo uploaded is automatically set as the primary logo and used as the default. Once you have additional logos uploaded, you can change which one is primary (default).
When you create a custom URL, you can choose which logo to use, regardless of which logo is set as the primary (default) here.
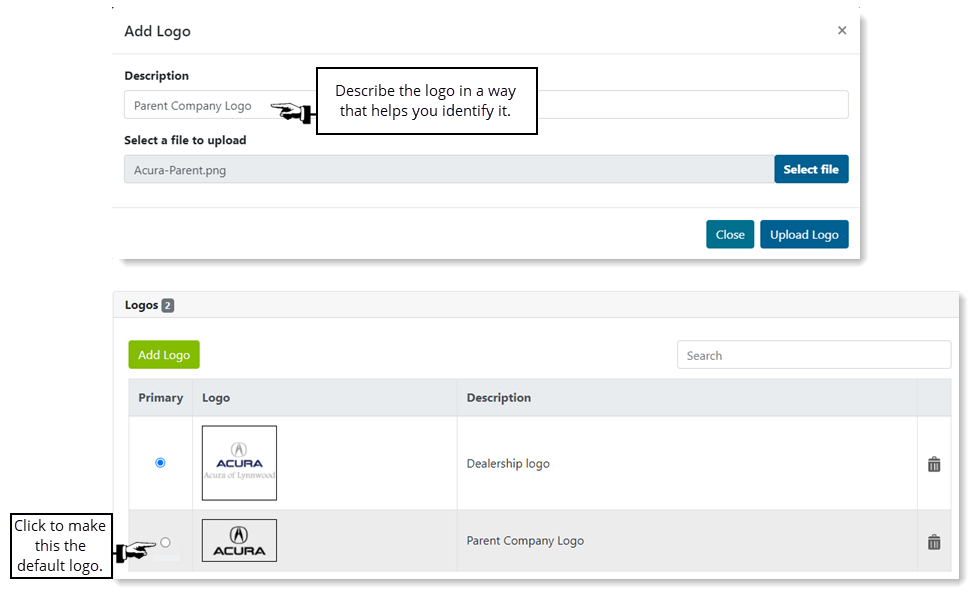
Only image files can be uploaded. There is no file size limit.
Change the default logo
Click the radio button in the Primary column for the logo you want set as the default and then click OK to confirm the change.
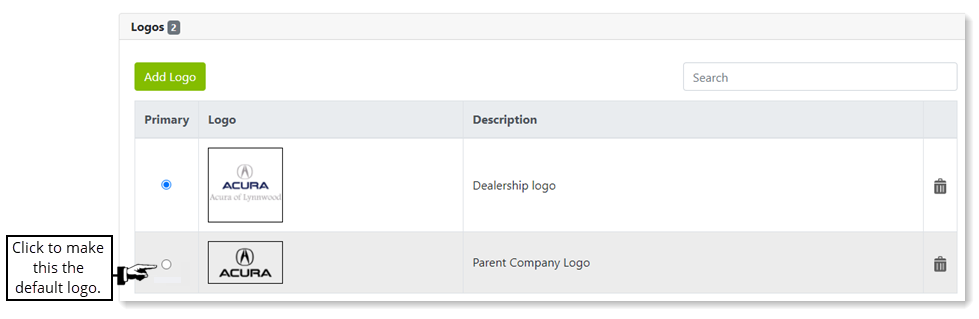
Remove a logo
If a logo is associated with a customer URL, you cannot delete the logo.
Click the trashcan icon for the logo and click OK to confirm removing it.
The next logo listed, if there are any, is automatically set as the primary (default).
URLs
Custom URLs allow customer vendors to enroll online for Nvoicepay payments. Customer vendors also receive a paper enrollment form with each print check received.
Creating a custom URL is straightforward. There are just a few things to keep in mind:
-
The Friendly Name must be unique, not just for this customer, but across all customers.
-
Spaces cannot be used in the Friendly Name. You can enter alphanumeric characters and use the dash; other special characters, such as an underscore, are not allowed. For example, 1CochranAutomative is acceptable; #1CochranAutomotive is not because # is a special character that is not allowed. AAHoldings and AAHoldings-Employee are acceptable, A&AHoldings is not because & is a special character that is not allowed.
-
The logo set as the primary (default) in the Logo section is automatically selected here. If you unselect it and don't select another logo to use, when the custom URL is created, it automatically looks to see if there are logo(s) uploaded in the Logo section and uses the primary (default). If there are no logos in the Logo section, the Customer Name entered for the custom URL is used.
You'll create a Domestic, International, or International-Employee custom URL. The new Domestic Digital Enrollment Form asks the vendor a few questions to determine whether to collect ACH or Mastercard data. International vendors and employees continue to use the current enrollment forms for now. (New digital international enrollment forms will release in a later sprint.)
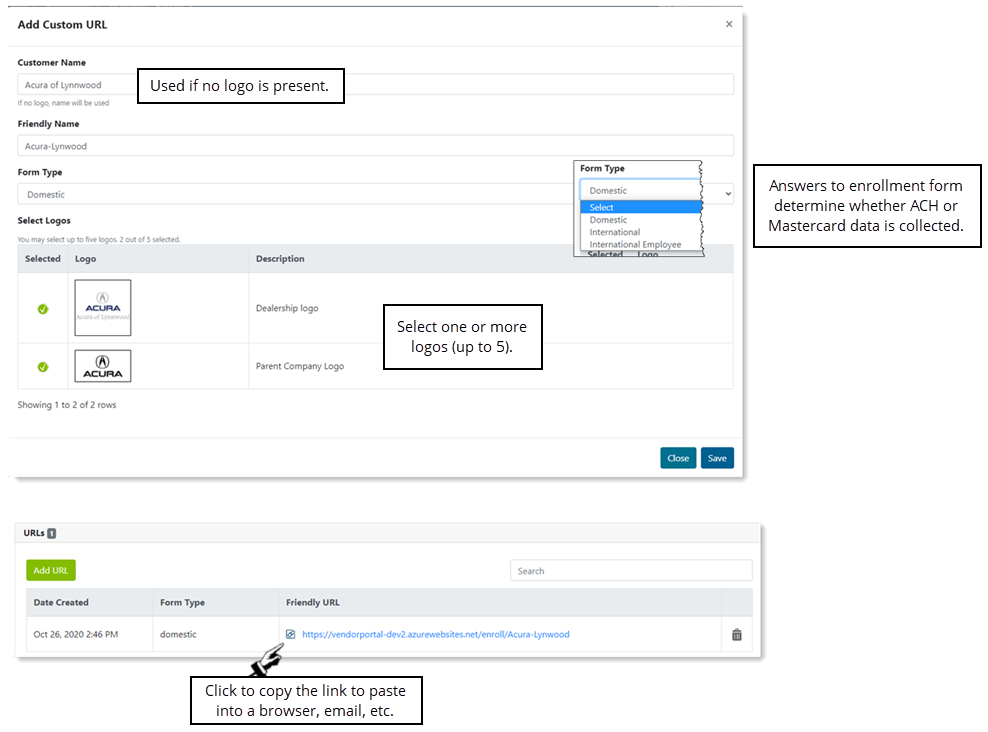
The Friendly URL is sent to the appropriate customer vendors. Once the vendor submits the enrollment, it displays on the Enrollments Listings page where you can see the Form Type (Domestic, International, or International-Employee) and the Form Path ACH, ACH-Empl, ACH-Update, or MC).
- Only an Ops Toolkit Admin can delete custom URLs. Please use caution when doing so to avoid deleting a URL that may be in use. Delete cannot be undone.
Notes
This section lists notes that have been added through Admin Portal.
Add Note is not yet implemented.
Click Edit to view the text of the note. (You cannot view attachments at this time. Editing a note is not allowed.)